The Smart Audit tool is a powerful feature for auditing census data by comparing the initial dataset with the updated information during the enrollment process. It helps identify errors, such as missing or mismatched data, allowing users to correct these discrepancies easily. Below is a step-by-step guide on how to fix errors in census data, including common issues and troubleshooting tips when using Smart Audit
Types of Errors Identified by Smart Audit
New Employees: Employees that appear in the updated data but were missing in the initial census.
Missing Employees: Employees present in the initial data but missing from the updated data.
Mismatched Records: Instances where employee details (like name, job role, or address) differ between the initial and updated data.
Logical Errors: Errors such as missing values, incorrect zip codes, or unfilled fields like medical coverage, which may not be caught automatically.
STEP BY STEP GUIDE
Step 1: Access the Smart Audit Tool
Click on "Tools" from the main menu.
Select "Smart Audit" from the list of available tools.

Step 2: Select the RFP
In the Smart Audit interface, click on the dropdown button to select the RFP (Request for Proposal) you are currently working on.


Step 3: Upload Your Census Data
Click on the RFP to open it.
You will now need to upload the file for comparison. To do this, click on Browse File and select the file you wish to upload.

Step 4: Specify the Census Tab
Once the file is uploaded, click on the dropdown trigger to specify the tab in your uploaded file that contains the census data.
Always ensure you select the “Census” tab from your sheet.


Step 5: Generate Results
Click on Generate Results to run the comparison between the initial and updated census data.
The system will compare both datasets and highlight any discrepancies.

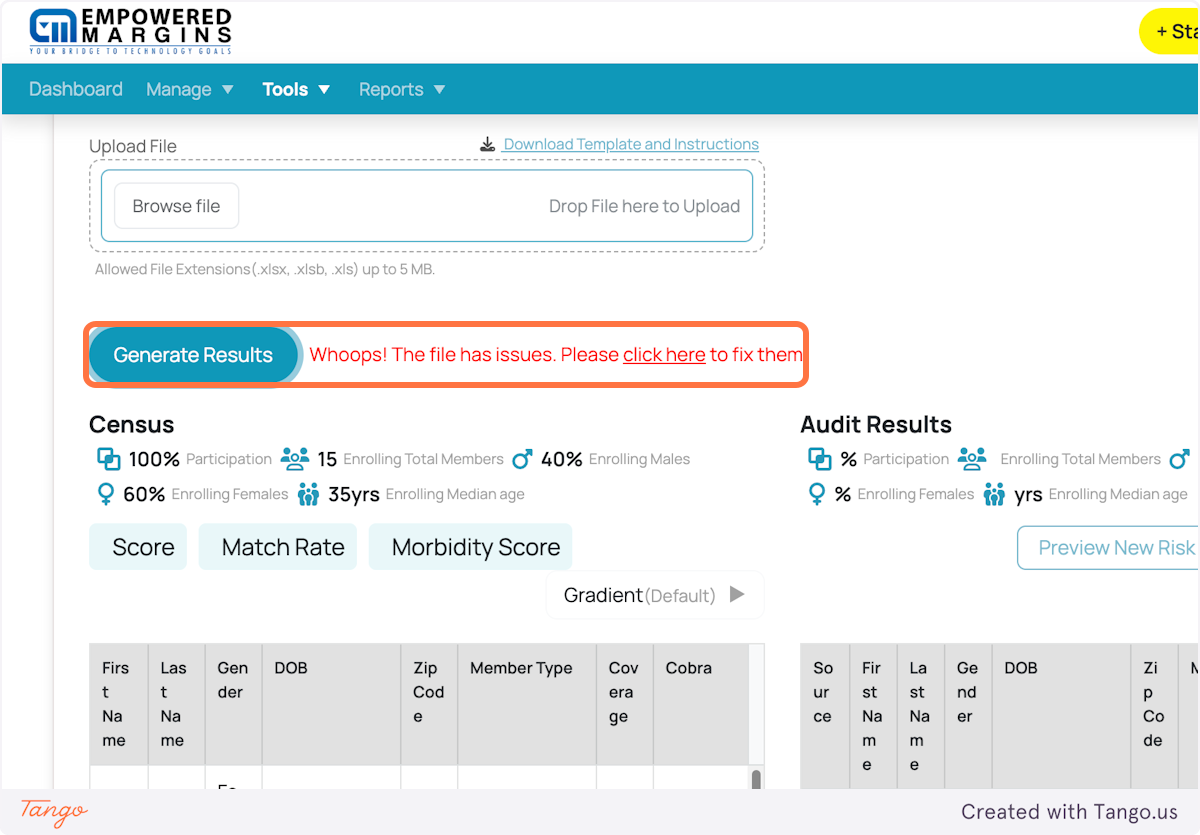
Step 6: Review Issues with the Census Data
If there are issues with your file, a message will appear indicating that there are missing or incorrect values in the uploaded census sheet.
Click “Click here” to view the details of these issues.

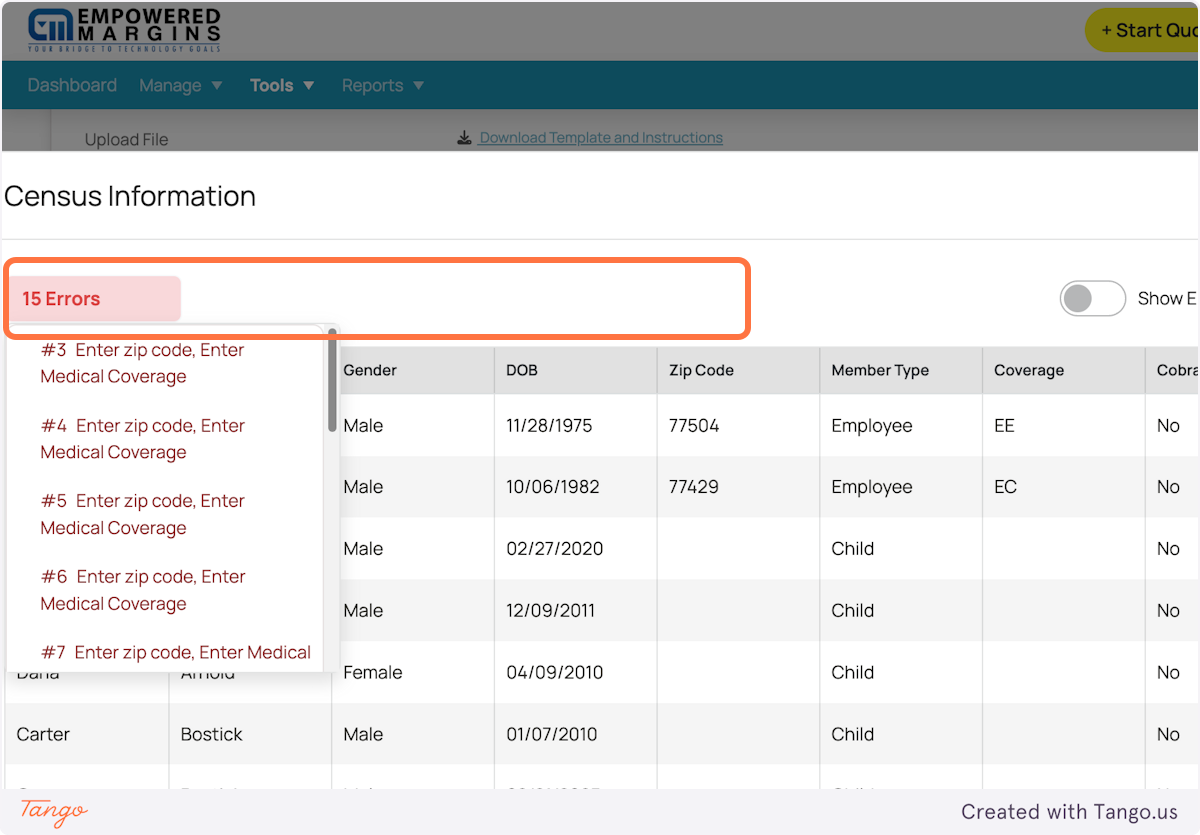
Step 7: Review the Errors
A pop-up window will display the items that are missing or incorrect, along with the number of errors found (e.g., 15 errors in this case).
Click on the drop-down arrow to see a detailed list of errors. This will show you what’s missing or incorrect, such as missing zip codes, missing last names, missing medical coverage information, etc.
You can use the toggle button to only view rows that contain errors.

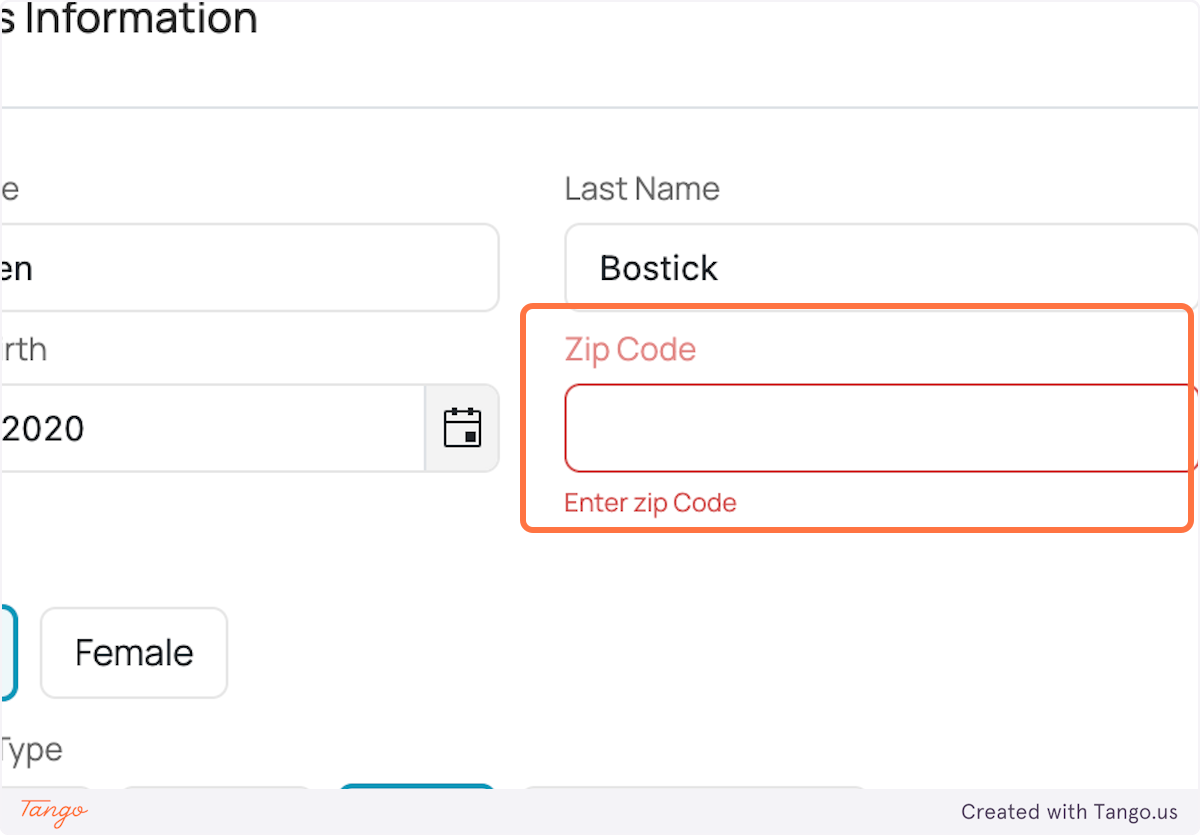
Step 8: Fix the Errors
Once you’ve identified the errors, you can begin correcting them:
Click on the three-dot button next to each row to edit or add missing information.
In this example, you may need to add a missing zip code or update coverage information.
Fill in the missing or incorrect data with the correct information for each affected row.
After fixing the errors for each item, move on to the next item until all discrepancies are resolved.


Step 9: Save the Corrected Data
After fixing all the errors, be sure to click SAVE to save the updated data.
This will ensure that your corrected census data is saved and ready for further processing.

Was this article helpful?
That’s Great!
Thank you for your feedback
Sorry! We couldn't be helpful
Thank you for your feedback
Feedback sent
We appreciate your effort and will try to fix the article