How to Create and Manage an RFP Using PHQ Functionality
This guide will walk you through the steps to create a Request for Proposal (RFP), upload census information, complete group details, and manage member-level data using the Personal Health Questionnaire (PHQ) functionality.
Overview
The PHQ feature streamlines the RFP process by allowing member-level health information to be collected securely and efficiently. Instead of relying solely on census files, you can send PHQ forms directly to members, track their progress, and manage responses in one place.
This functionality ensures:
Faster, more accurate data collection.
Less manual back-and-forth with members.
Better visibility into the status of each PHQ submission.
By following the steps below, you’ll set up your RFP, invite members to complete their PHQ forms, and prepare the information you need for quoting.
Step 1: Create a New RFP
From your dashboard, click Start RFP.
For Methodology, choose PHQ.

In uploading your group or census data, use Smart Extractor™ to import details from your file, or select Enter Data Manually.
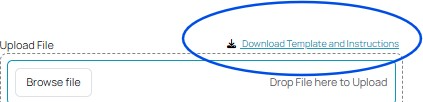
If you’d like to bulk upload member data, you can download the census template from DataHub and fill in all required fields. Ensure that the Email column is present and filled in for all members. Without this, PHQ forms cannot be sent.
Assign an Agent from the dropdown list.
Upload your census file.
Click Next – Group Info.
Step 2: Enter Group Information
On the Group Information page, this will auto populate if you used Smart Extractor, if not, manually provide all relevant information on each field.

Once complete, click Next – Census Info.
Step 3: Review Census Information
On the Census Info page, you can:
Add Members individually.
Upload Census to add additional members.
Send PHQ Emails directly to members so they can provide their own information.
Download all RFPs in one single click.

Step 4: PHQ Status and Emails
PHQ statuses track where each member is in the process:
Pending → Members are awaiting the PHQ email. You can only send emails in this status.
In Progress → A member has started completing their PHQ form.
Completed → The PHQ form has been submitted.

Note: PHQ statuses cannot be reopened once they are In Progress or Completed. Emails can only be sent when the status is Pending.
Step 5: Copy and Share the PHQ Link
At the bottom of the group record, you’ll see a Health Application link.
Click “Click here to copy health application link.”

This link can be sent directly to members or brokers if they prefer accessing the PHQ that way instead of by email.
As they click on the link, they are directed to the PHQ registration or login page.

Always inform members to click “Sign Up” and proceed with the process.
Once done, it will take them to the application and start filling out all the details required.
Step 6: PHQ Emails
If by email, click on “Send PHQ Email” button:

You will be redirected to a pop up where a template is ready - this can be edited before it can be sent. Once clicking the “Send Email” button, you will also be able to see a Preview before it sends.

PHQ invitations are sent from chambercare@datahub.insure
Members will then receive an email with a link to begin their PHQ - that looks like the one below:

Note: As of the moment, only members will receive the email.
Step 7: Edit Member Details
To update a member’s information:
Click the three dots (⋮) under the Action column.
Select Edit.
Update details such as name, date of birth, email, coverage type, COBRA status, or job title.
Click Save.

Step 8: Download PHQ Information
You can export PHQ data for all members at once:
Click the Download button in the top right.
Select All PHQ to download all records into a single file.

Next Steps
Once your group and census information is finalized, you’ll move into the Workbench to continue with quoting, underwriting, and the rest of the RFP process.
Was this article helpful?
That’s Great!
Thank you for your feedback
Sorry! We couldn't be helpful
Thank you for your feedback
Feedback sent
We appreciate your effort and will try to fix the article