This guide outlines the streamlined process for initiating a Request for Proposal (RFP) and generating a health application link for an individual client.
Step 1: Initiate the RFP
To begin, you will need to define the scope of the request within the dashboard.
Access the Tool: Click the Start RFP button located on your primary dashboard.

Select RFP Type: A pop-up window will appear. Select Individual as the RFP type.
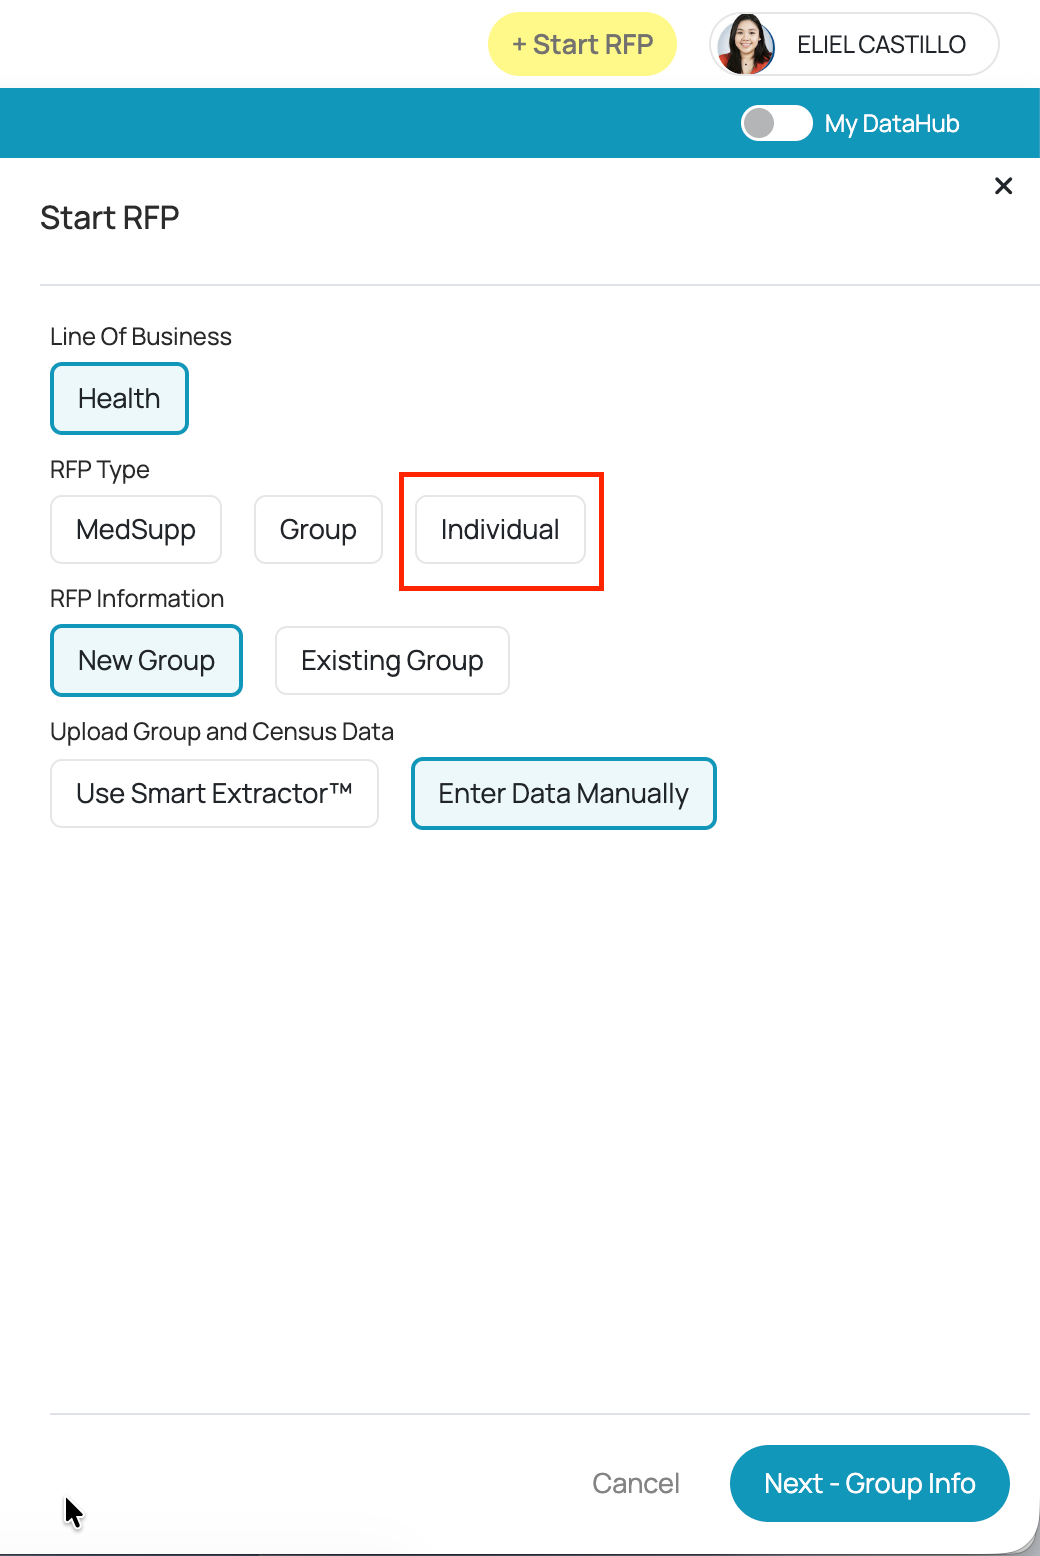
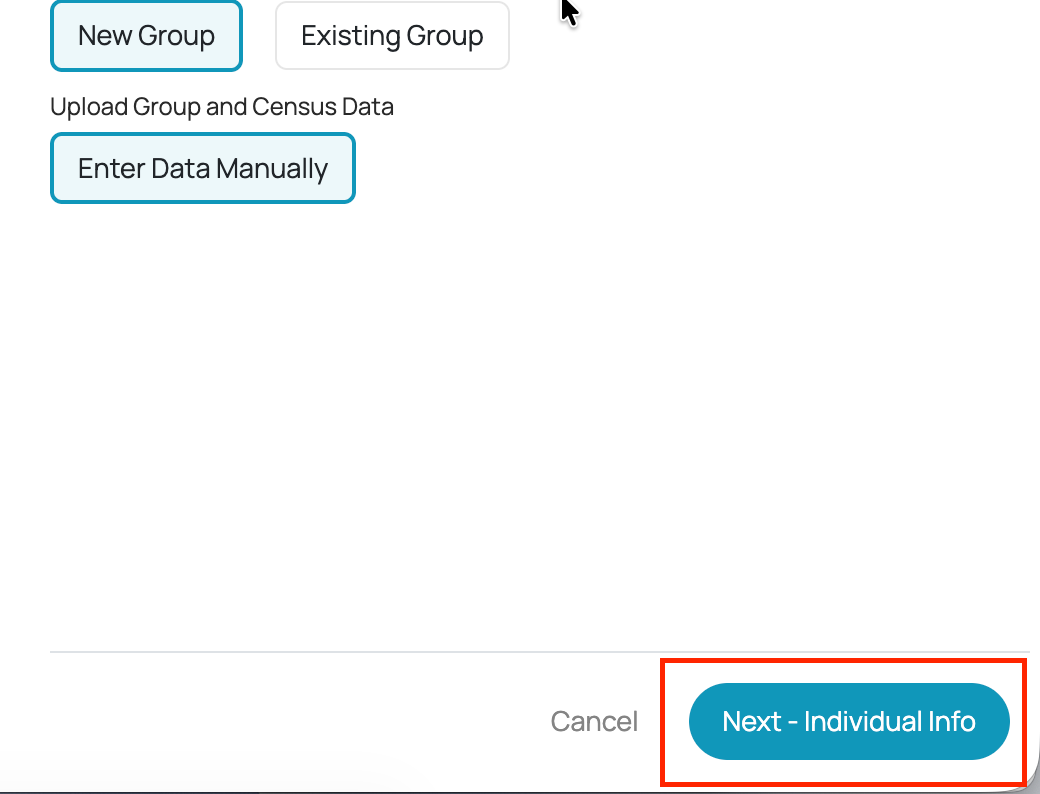
Proceed: Click the Next: Individual Info button. This will move you into the dedicated workspace tab.
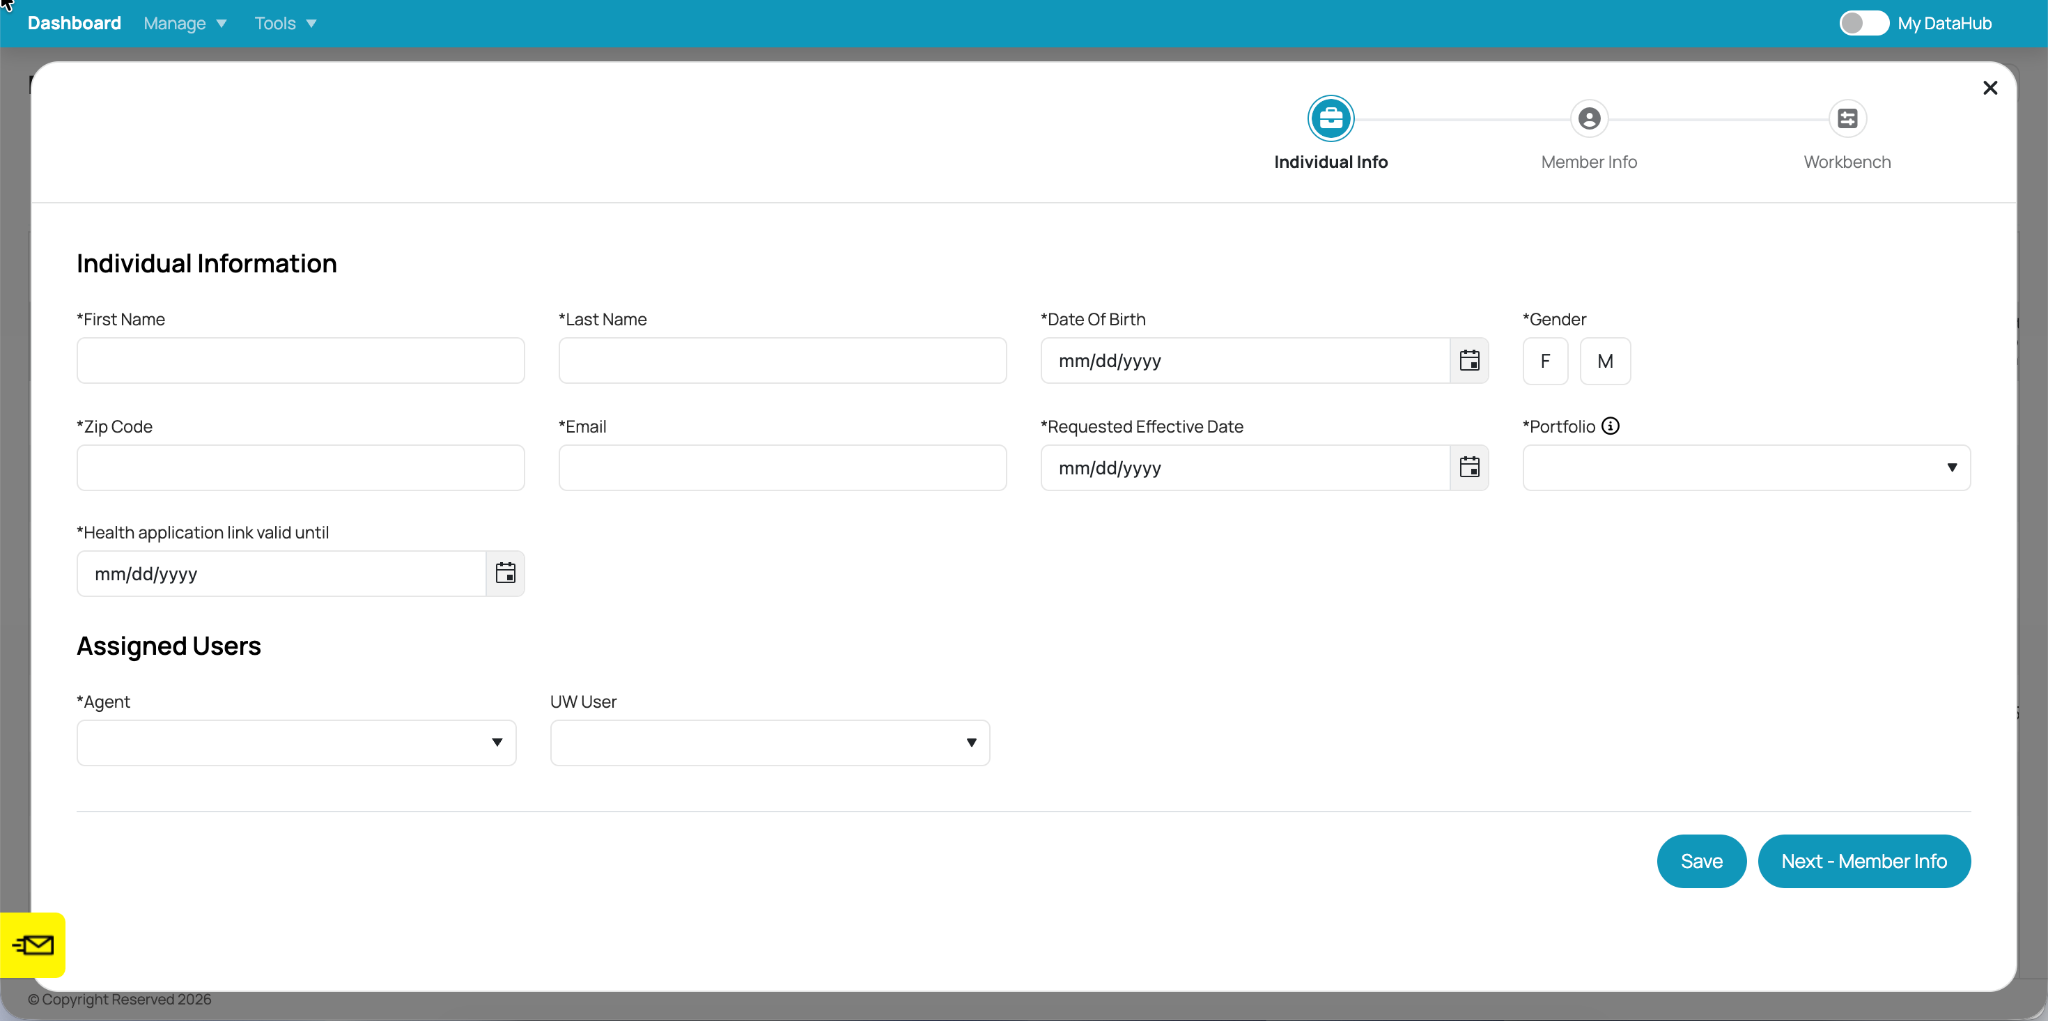
Step 2: Enter Individual Information
In this stage, you will provide the specific details required for the underwriting and quoting process.
Required Fields: Enter the individual's First Name and Last Name.
Plan Selection: Use the dropdown menu to choose the appropriate plan type (e.g., Medical or Dental).
Broker Selection: Select the relevant Agent or Broker name from the designated field.
Team Notifications: (Optional) Use the UW User field to select teammates who need to receive automated status updates regarding this file. You may leave this blank if no notifications are required.
Step 3: Save and Generate the Application Link
The final step generates a secure link that allows the individual to provide their health information directly.
Save Progress: Click the Save button at the bottom of the form to finalize the record.
Locate Link: Scroll down to the bottom of the page to find the Health Application Link, which is generated automatically upon saving.
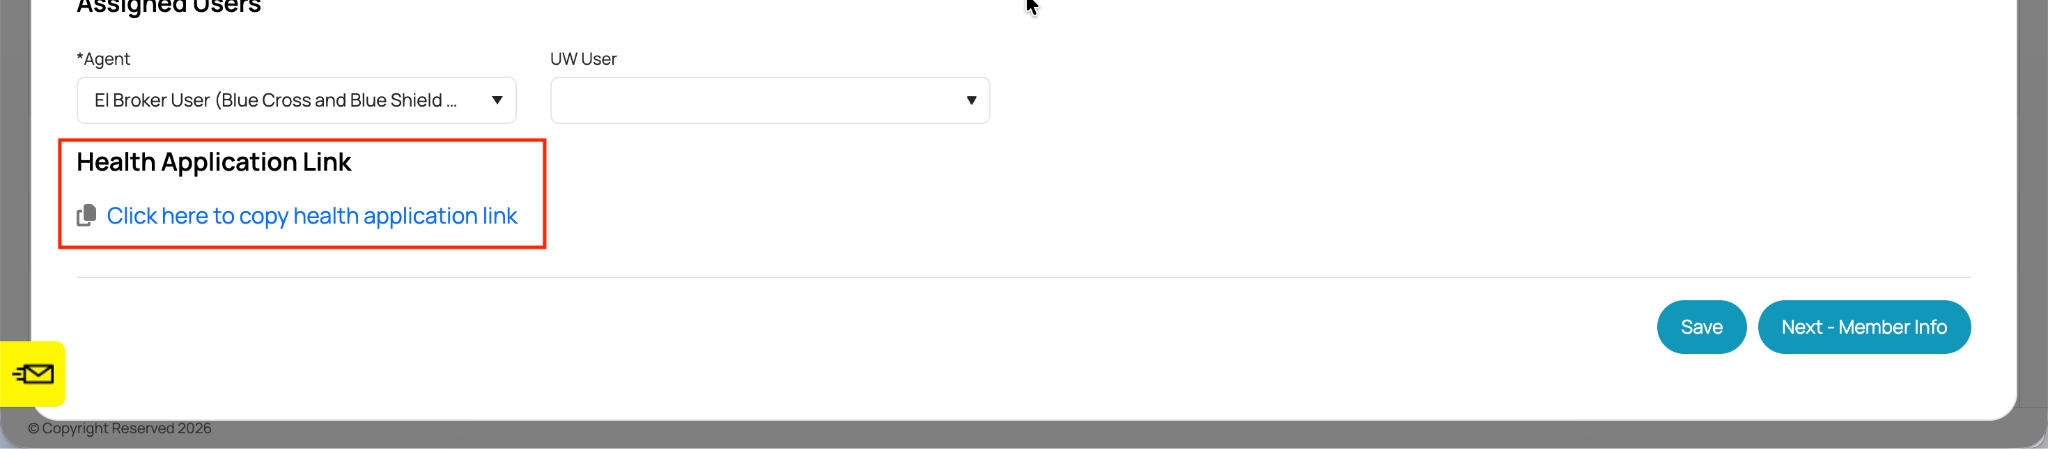
Copy Link: Click the link once; it will be automatically copied to your clipboard.
Distribute: You can now paste the link into a browser to verify the form or send it directly to the client via email or secure message.
Was this article helpful?
That’s Great!
Thank you for your feedback
Sorry! We couldn't be helpful
Thank you for your feedback
Feedback sent
We appreciate your effort and will try to fix the article